macOS - Switching Between Light and Dark Mode
macOS includes several different modes to alter the system's appearance: Light, Dark and Auto. In this short article we'll show you how to switch between them.

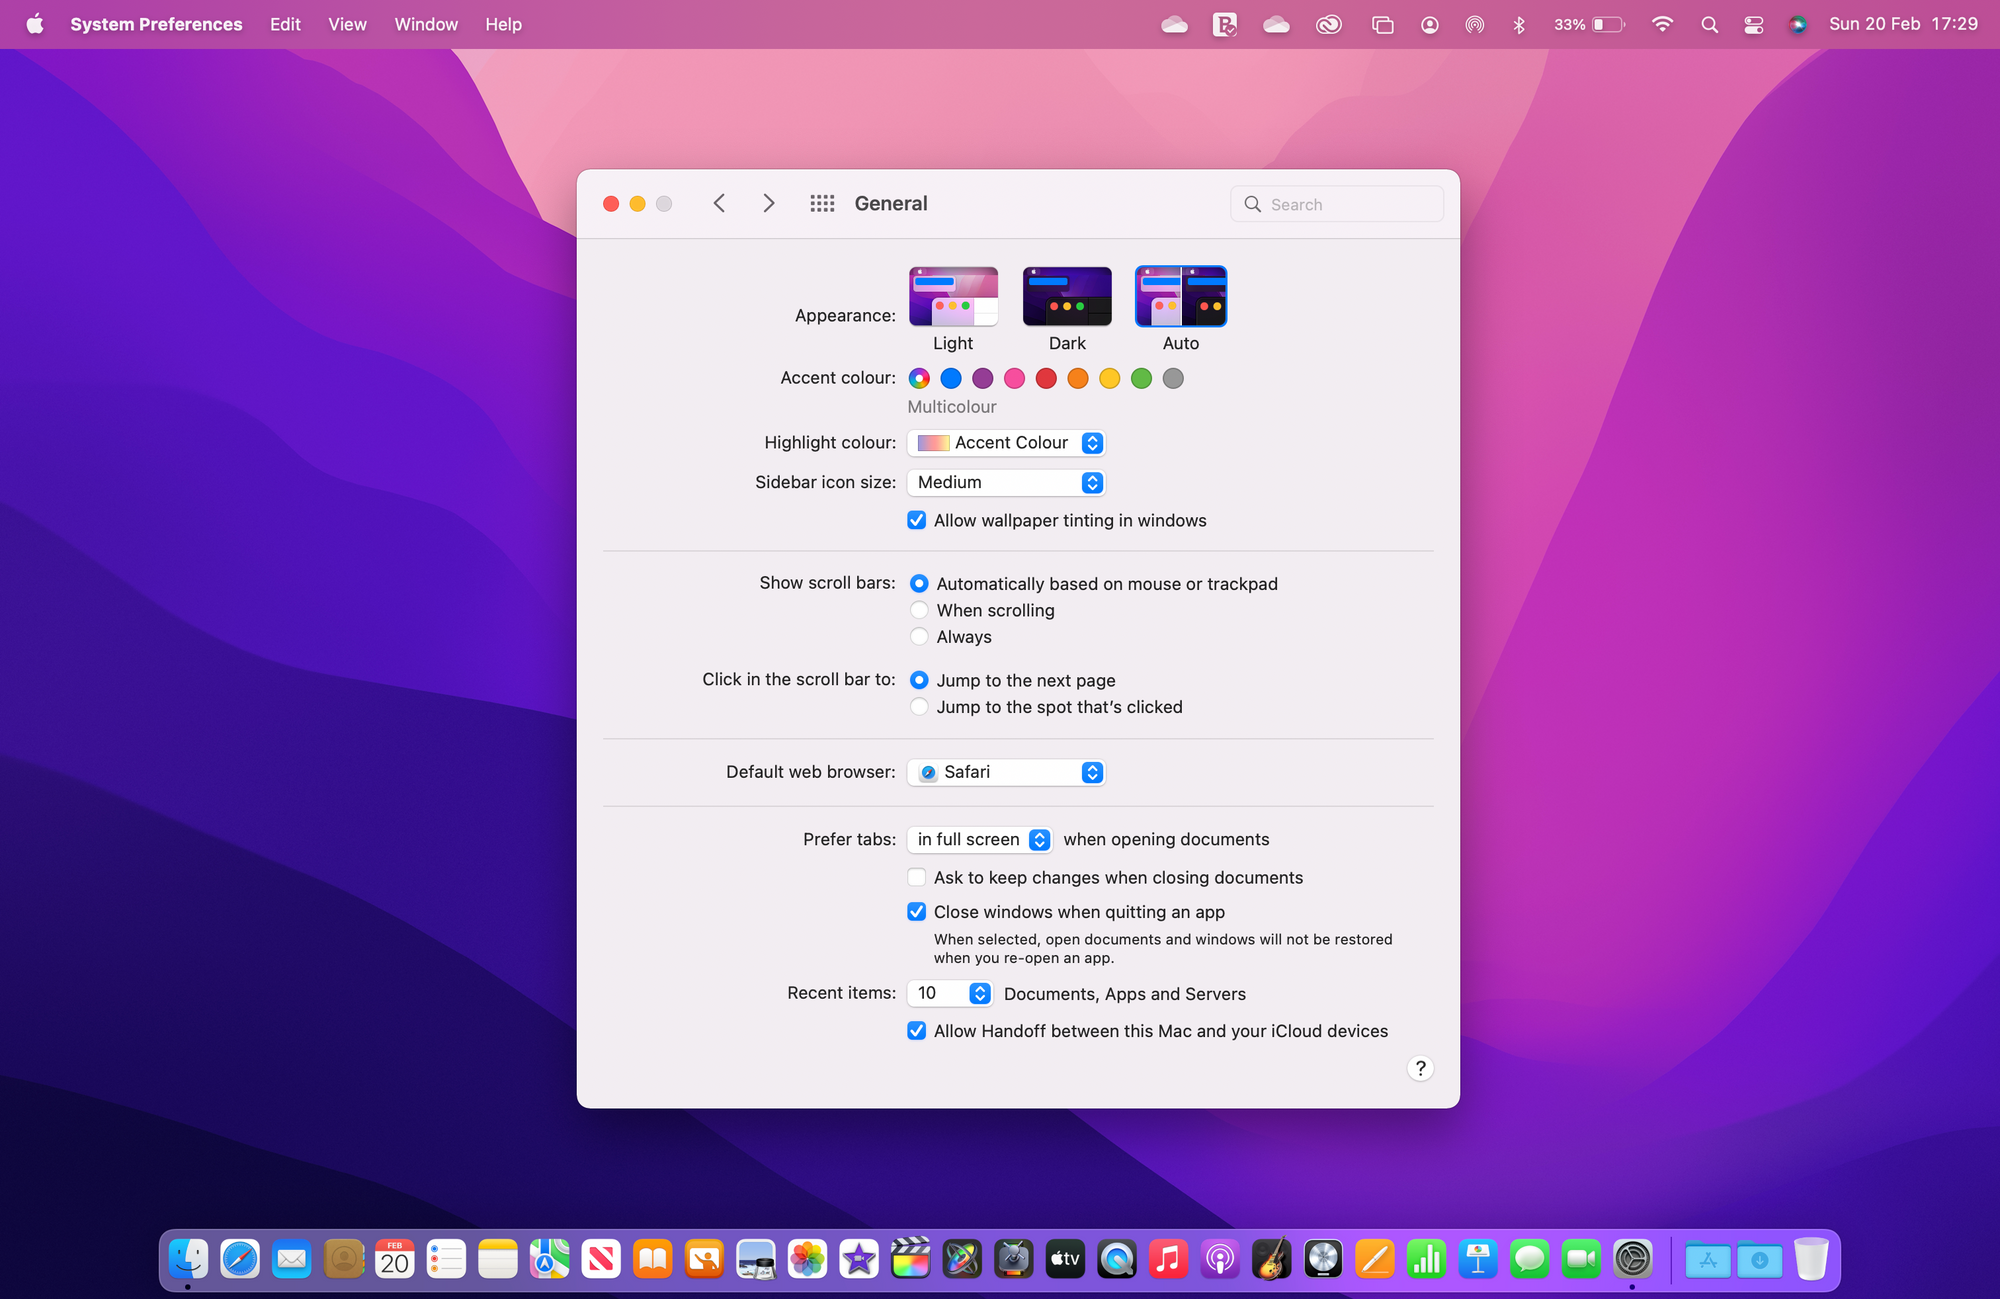
When setting up a new Mac you will be prompted to choose between the three different appearances Light, Dark and Auto. This is a quick and easy way to select a preferred mode from the outset, but if you want to change your choice later on then you'll need to do the following...
Using System Preferences to Switch Appearance
- Click on > System Preferences (you can find the Apple icon in the top left corner of the macOS menu bar. System Preferences is also accessible from the Applications folder).
- From the list of preferences, click on General.
- Select the desired mode from the Appearance option: Light, Dark or Auto.

The appearance of the macOS system will update instantly.
Light mode is the default mode on most devices and primarily uses dark text on white backgrounds and a light appearance for buttons, menus and windows.
Dark mode may help to reduce eyestrain in low light enviornments. It also reduces battery drain on devices such as the MacBook Air and MacBook Pro when operating on battery.
Auto mode will automatically toggle between the light and dark appearance depending on the time of day (determined by sunset and sunrise).
These modes will also change various other applications on your system (including 3rd party software) if they are set to take advantage of the appearance change.
::TIP:: It is now commonplace for individual software applications to include their own appearance settings. If such an option includes 'follow system settings', then it will also change automatically depending on what option is chosen for the macOS appearance.
These options were introduced in Mac OS X Mojave (10.14) and work in all versions of macOS since then.
Originally posted 20 February, 2022 and updated 14 May, 2024.

