macOS - Switching Between Applications
When you have multiple applications open at once there are several ways you can switch between these applications efficiently.

Video Guide
SOUNDBYTE #3 macOS Switching Between Applications YouTube video.
Using the Dock
The Dock is a convenient way to jump between active applications on your Mac.
Active applications will be highlighted in the dock by a coloured dot under the applications icon.
- Click on the application's icon in the Dock and it will be displayed on screen.

Using the Application Switcher
You can use the application switcher to move between your active applications.
- Hold down the command key and press the tab key to reveal the application switcher.
- Keep the command key pressed down and then press the tab key again to cycle through the active applications. Release the keys once the application you wish to open is highlighted.

Using Mission Control
Mission Control provides a good visual overview of all your active applications and windows.
To open Mission Control you can...
- Click on the Applications folder and click on the Mission Control application. Alternatively you could use the Launchpad app to locate Mission Control.
..or..
- Swipe up with three or four fingers on a MacBook trackpad or an external Apple Magic Trackpad.
..or..
- Double-tap the surface of an Apple Magic Mouse with two fingers.
..or..
- ress F3 on your keyboard (or the Mission Control key on a MacBook with a Touch Bar).
To select your application...
- Move the mouse pointer over the different windows and a brief explanation of what the application is will appear over the window.
- Click on the application window that you wish to open.
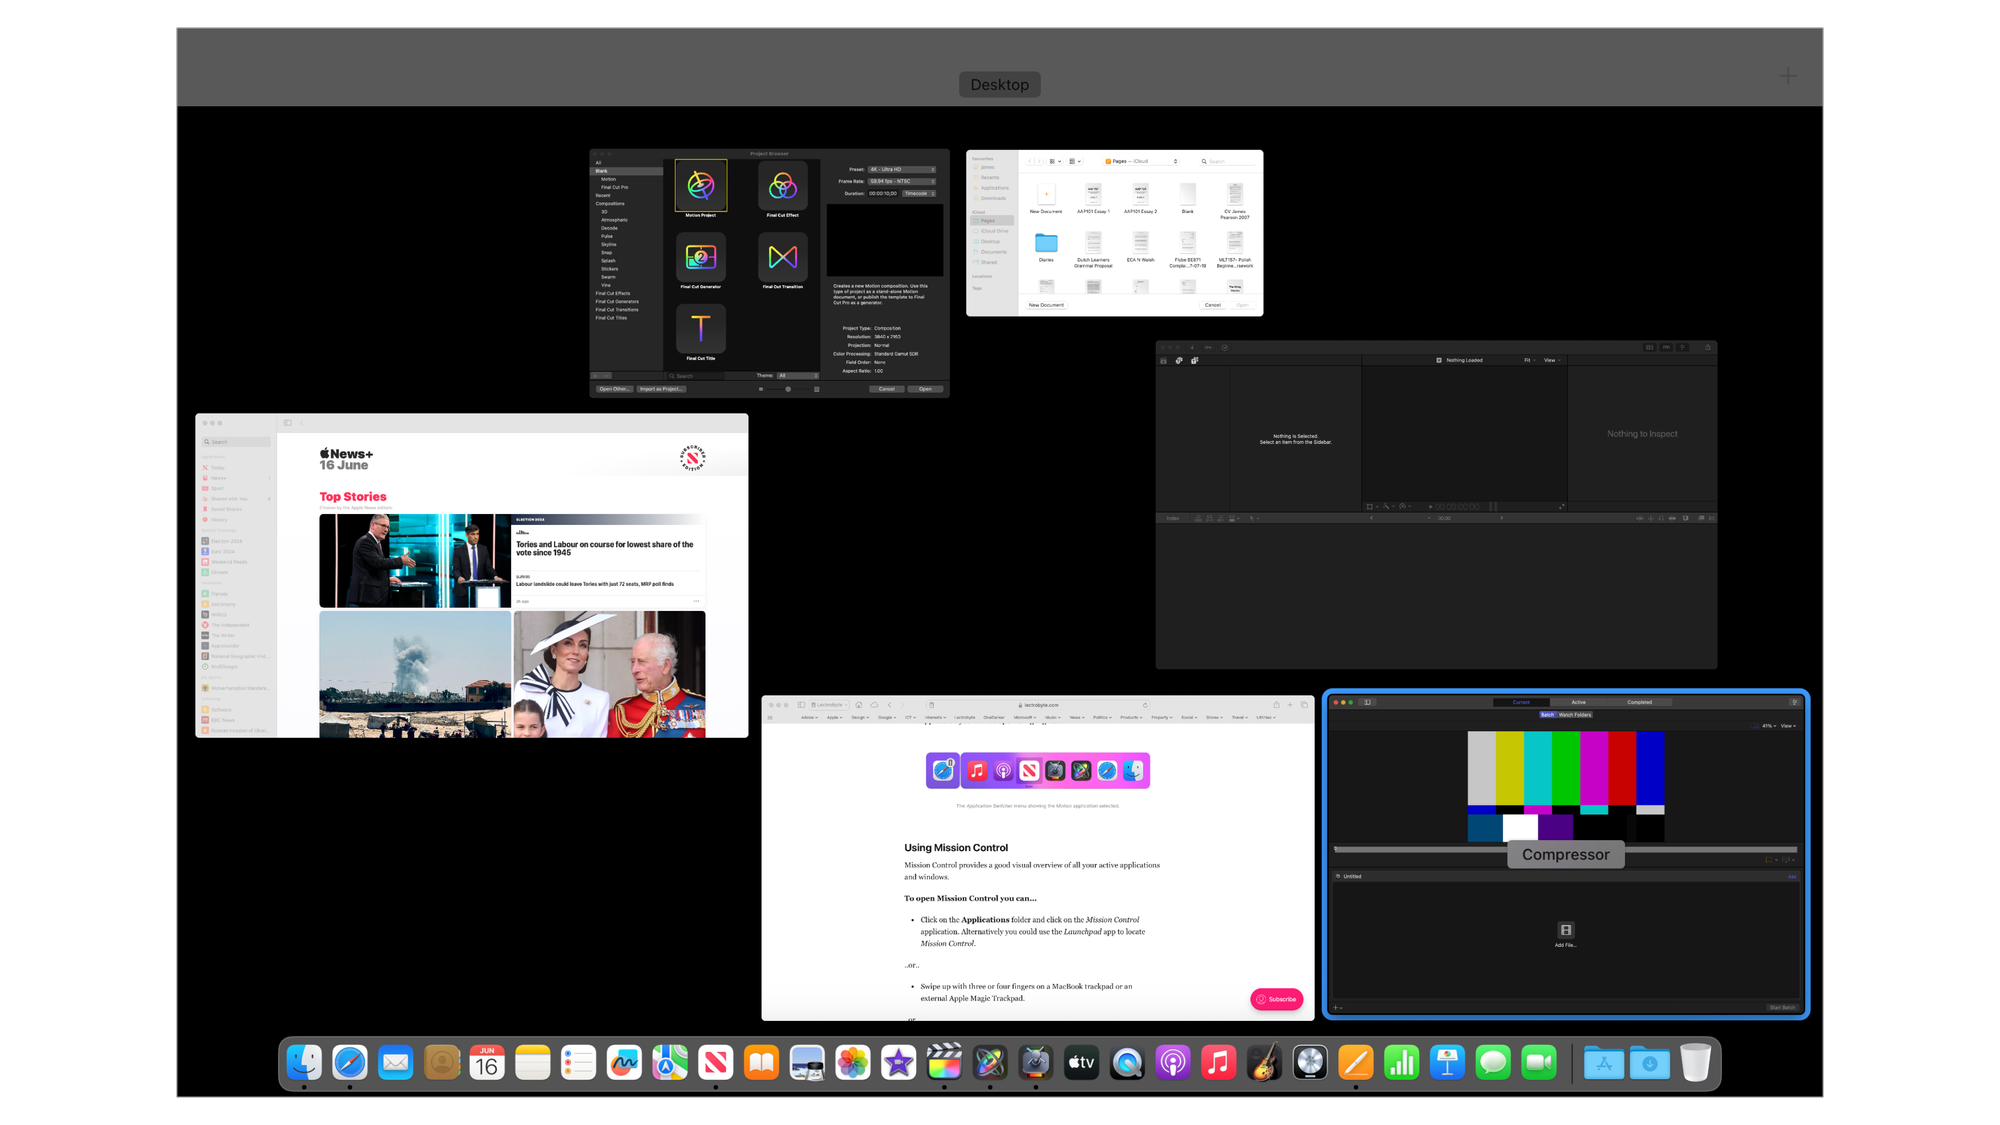
::TIP:: When using Mission Control any windows that are minimised in the Dock will not be displayed. Only windows open on the desktop will be shown in the overview.
Using Stage Manager
Stage Manager was introduced in macOS 13 Ventura and is another program that can be used to oragnise your applications and windows. By default this program is switched off.
To make Stage Manager visible on the menu bar...
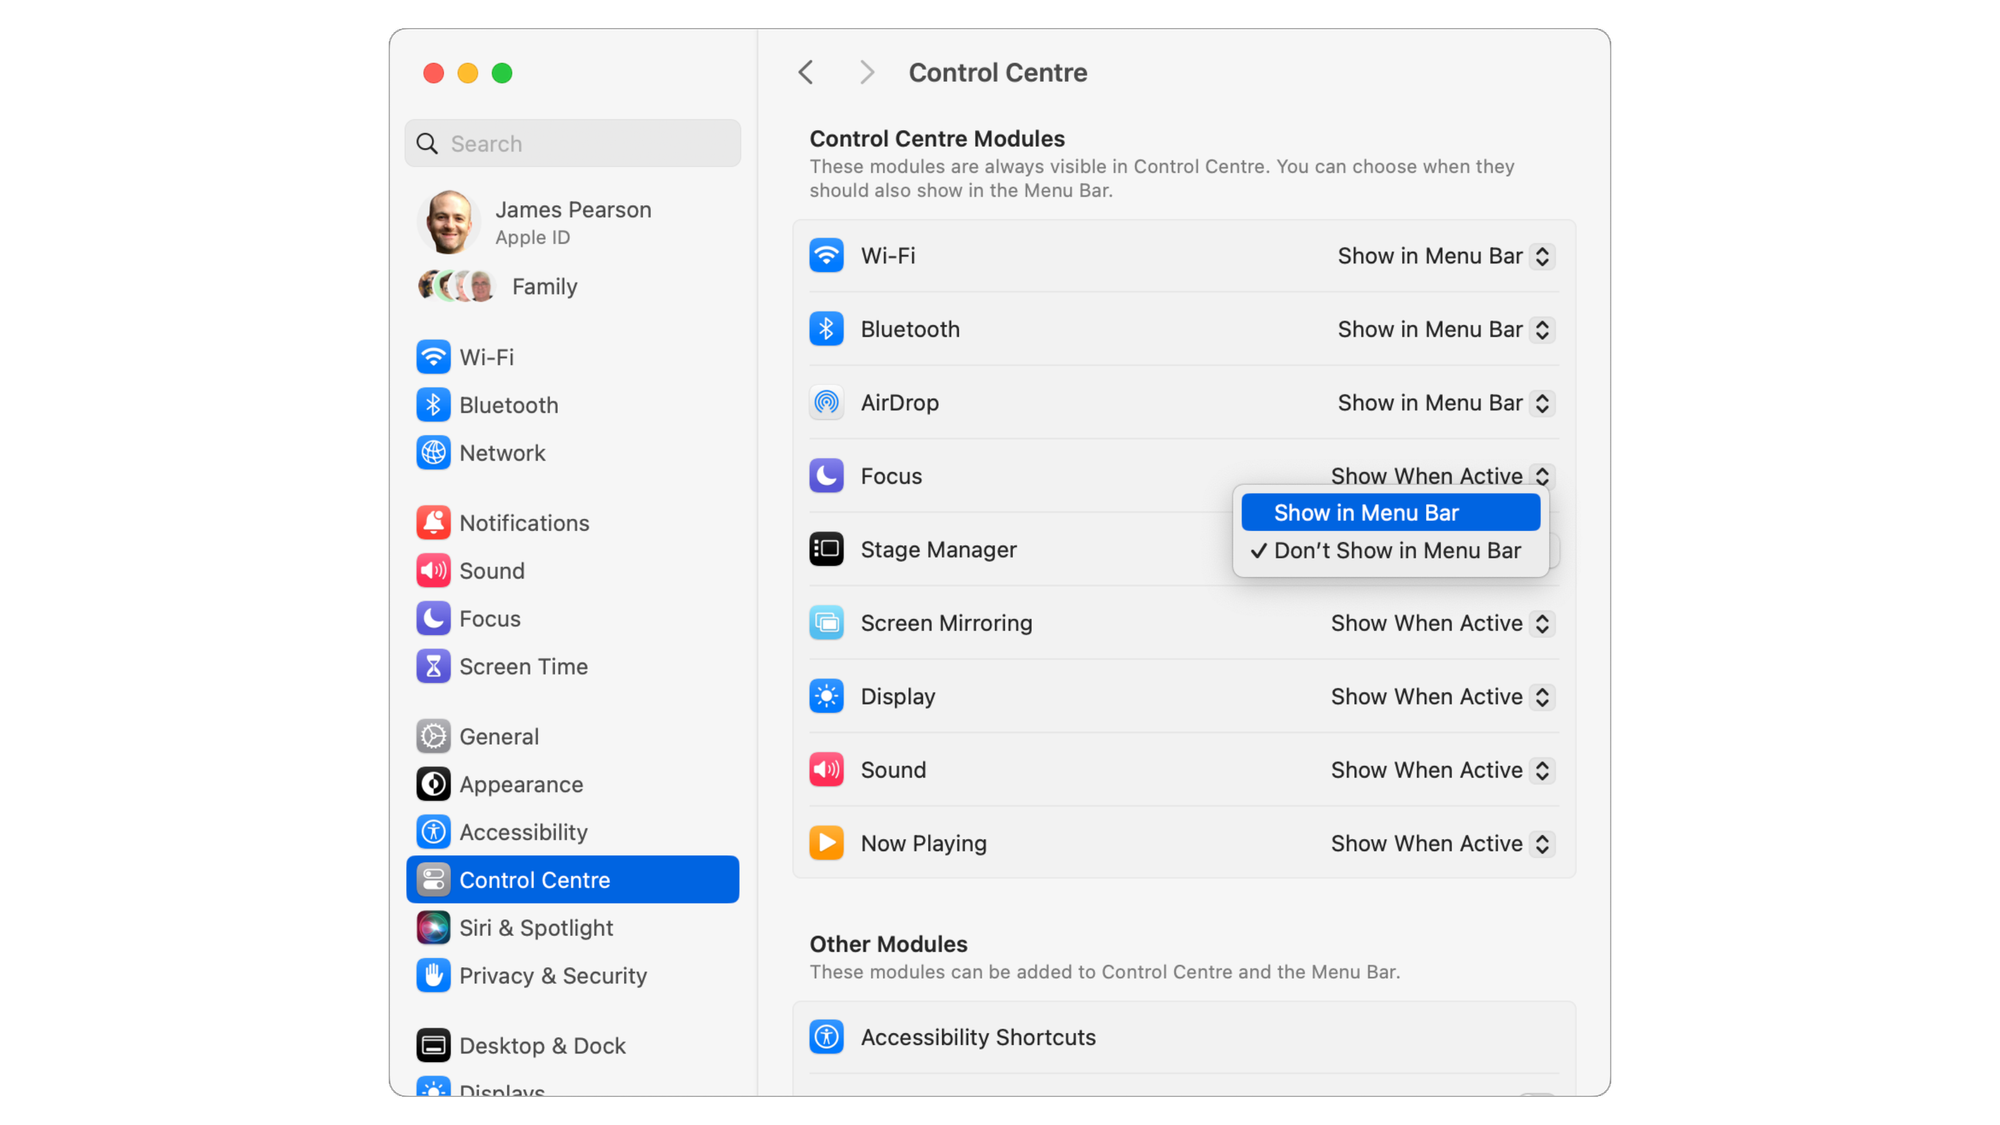
- Click on > System Settings (you can find the Apple icon in the top left corner of the macOS menu bar. System Settings is also accessible from the Applications folder) (called System Preferences on older versions of macOS).
- From the list of settings, click on Control Centre.
- Next to Stage Manager choose Show in Menu Bar from the selection menu.
The Stage Manager icon will appear in the top menu bar on the right-hand side.
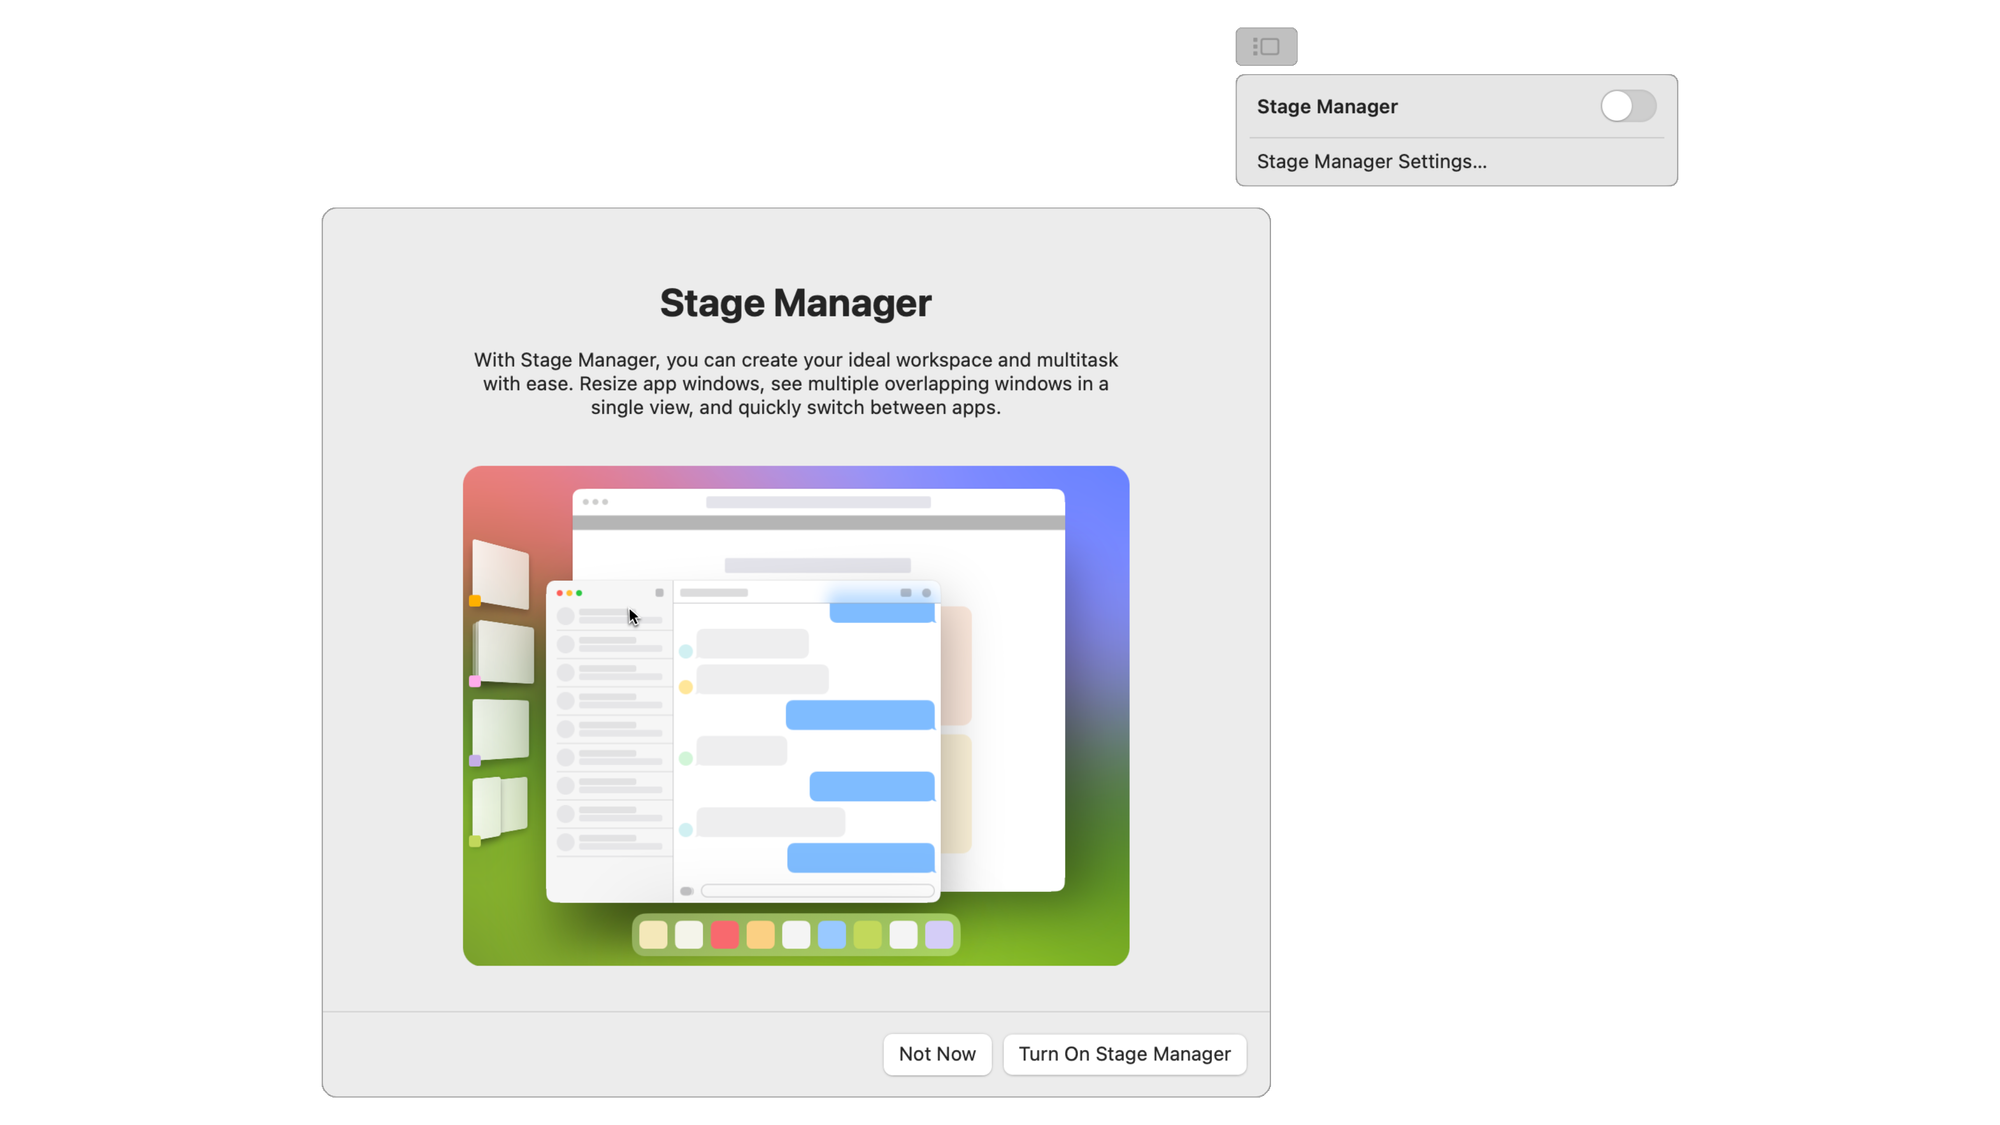
To activate Stage Manager...
- Click on the Stage Manager icon in the top menu bar on the right-hand side.
- Toggle the on/off switch to activate Stage Manager.
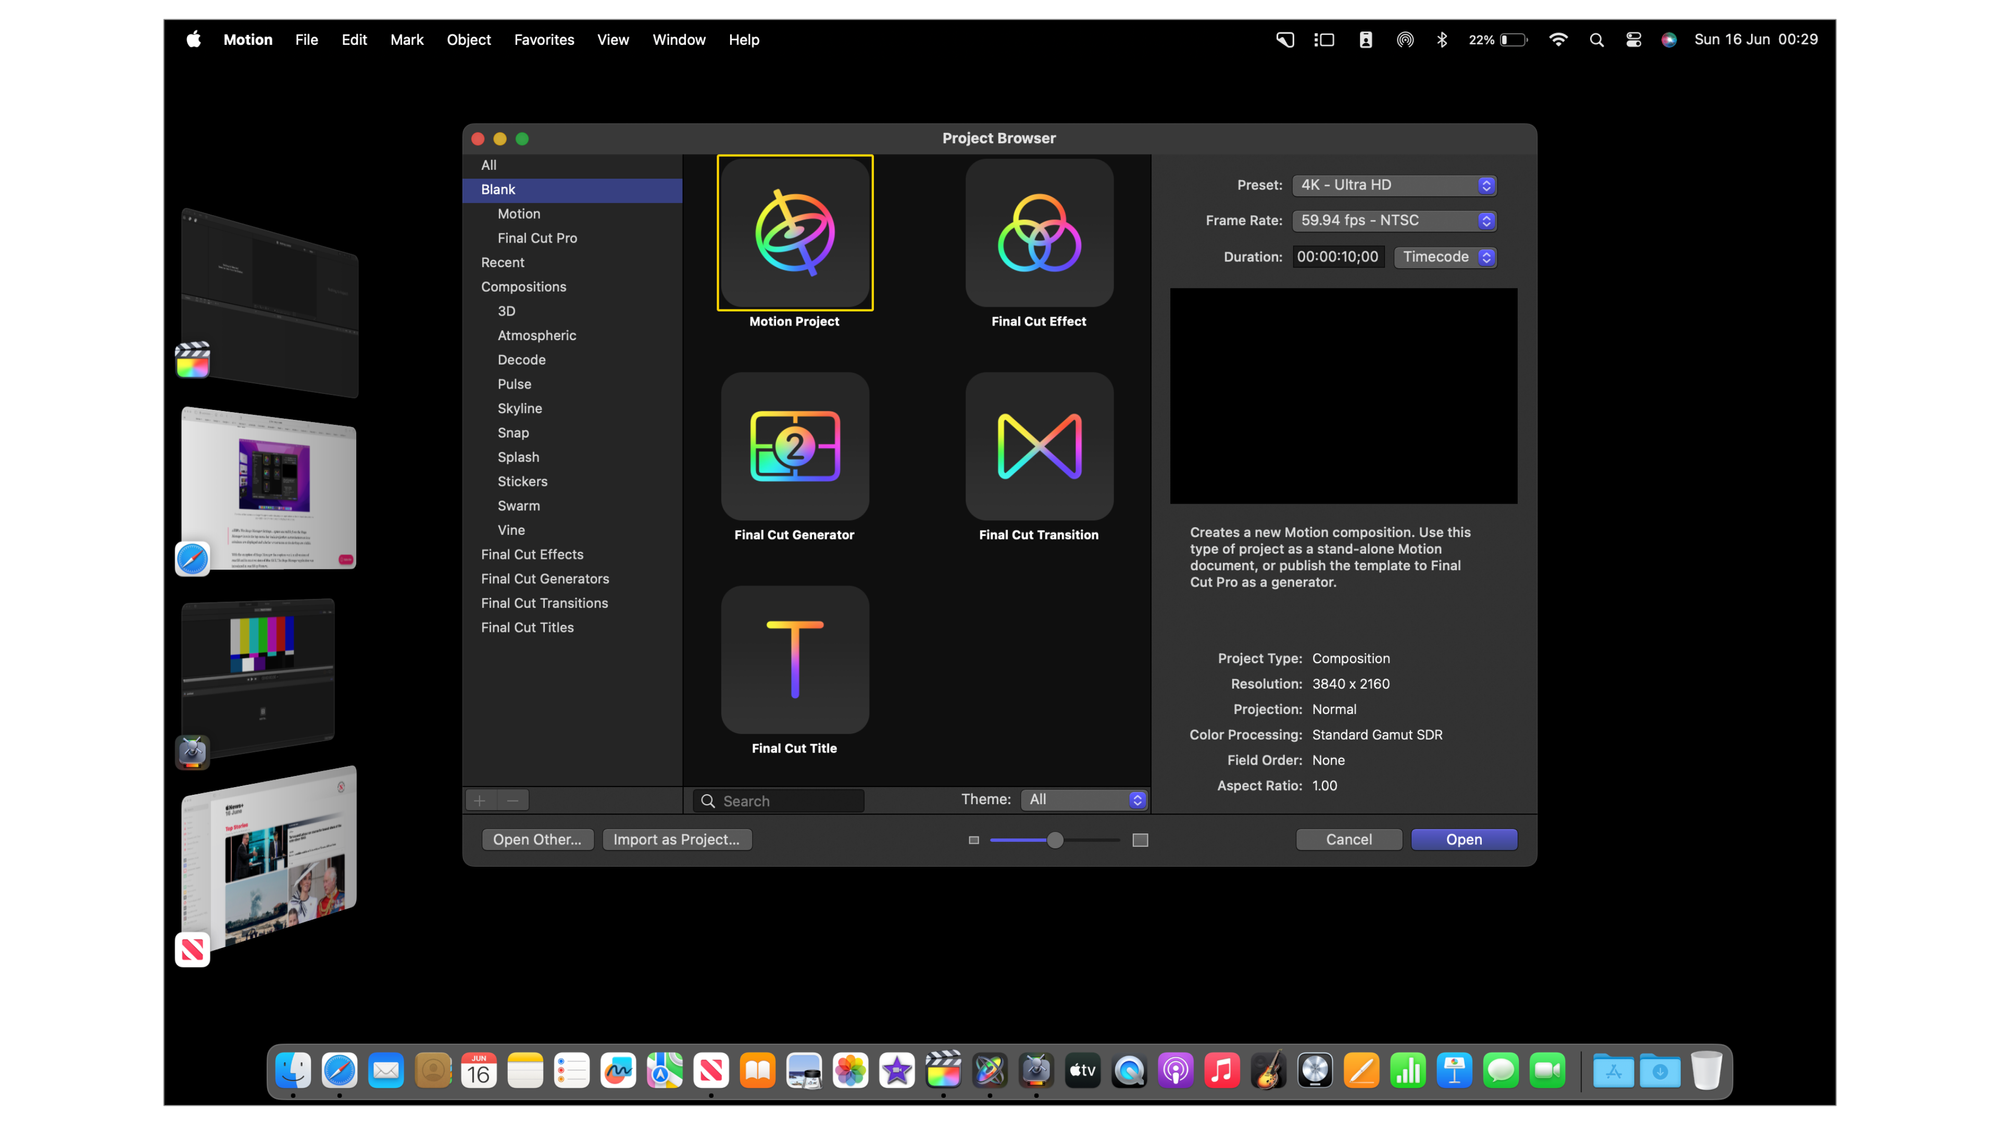
Once activated all currently open applications will move to the left-hand side of the screen for easy access. The application your working with will be displayed at the front.
- Click on an application on the left-hand side to display it's window on screen. The application that was currently displayed will then move to the left.
::TIP:: The Stage Manager Settings... option accessible from the Stage Manager icon in the top menu-bar includes further customisations on how windows are displayed and whether or not icons on the desktop are visible.
With the exception of Stage Manager these options work in all versions of macOS and in most versions of Mac OS X. The Stage Manager application was introduced in macOS 13 Ventura.
Originally posted 8 June, 2021 and updated 16 June, 2024.

